The following post was authored by SEO Consultant and Expert Bill Hartzer for .icu. 
Have you wondered what exactly it takes to get a new website up and running on the internet? It’s not only a domain name that you need–you need a website, which requires web hosting. So, essentially there are 3 main components that make up a website: the domain name, the website itself (which consists of website files), and the web hosting (where you put those website files). Once you have all 3, that makes up an internet website that you and I can visit through a web browser. Even though I have literally bought hundreds (thousands?) of domain names since my first domain name purchase in 1996, I thought about that process recently. What comes naturally to me because I’ve done it so many times, may not come naturally to everyone, such as you– who are reading this article. I have that process down so that it’s very efficient. I thought I’d share my process for buying, setting up website hosting, adding content, and getting the website to get indexed in the search engines. Here’s the process for setting up a website.
Finding and Buying a Domain Name
The first part of this whole process of setting up a website requires that you buy (register) a domain name. While you can set up a website without a domain name, the address (called the URL) won’t be customized to you or your business. You won’t have as much “control” over that domain name to do other things with the domain name, such as set up your own email address. There are a lot of other benefits to owning your domain name besides setting you your own email address. But, in all honesty, you won’t be as easy to “rank” in the search engine results without having your own domain name and your own website hosting for your website.
For a project that I am working on–a new service that provides recovery from “negative SEO” (where someone else tries to hurt your website’s search engine rankings), I chose to use the word “negativeseo” in my domain name. Using this exact keyword phrase that describes my new service tells visitors exactly what the website is about. While doing research to find the right domain name, I also chose to use a brand new domain name TLD (Top Level Domain). A Top Level Domain name is the “ending”, the “right of the dot” so to speak. You’re probably already used to hearing about .COM, .NET, and .ORG. However, about 5 years ago, ICANN, the organization that governs domain names, decided to let over 1,000 new TLDs be created by Registries. A registry is the “wholesale” company behind the ending. They make agreements with Registrars, who sell the domain names directly to the consumer. In this case, I chose to use a brand new TLD, which is the .ICU TLD. In this case, I thought it was totally appropriate and “crafty” to use NegativeSEO.ICU for my new “negative SEO recovery” service. I’m used to the letters ICU meaning “Intensive Care Unit”, which is located at a hospital. While this is one unique way to use the .ICU TLD for your domain name, it can also mean ICU as in “I SEE You”.
Once I had a domain name picked out, I went to a registrar of my choice–which was NameCheap.com. The price for the domain name was $.98 cents for the first year. Every year you must then renew the domain name, but the first year is about $1.00, which is a great deal. Once the domain name was registered, I needed to set up website hosting for the domain name.
Setting Up Website Hosting
Once you purchase a domain name or “register” a domain name, website hosting is required for the domain name if you’re planning on putting up a website. You don’t have to put up a website–but you can’t customize what appears on that domain name if you don’t have website hosting set up and a website set up. Website hosting requires a different fee (usually a monthly fee) than the annual fee to register your domain name.
There are so many choices that you have when it comes to website hosting. You can get hosting when you register your domain name. Or, you can do what I do, which is have your own web server that allows you to add several domain names (all with websites) on that same web server. If you are just setting up one website on one domain name, I do recommend using a separate web host such as HostDime.com, HostGator.com, or something like WPEngine.com, which is dedicated to hosting WordPress websites. In this case, I already have a web server at HostDime.com, so all I needed to do was log into my account and add the domain name on the web server. Once added, it allowed me to start configuring the website and add content (add web pages) to the website.
Configuring The Website and Adding Content
Once website hosting is set up, you’ll either need to configure your website–or use the built-in website setup tools provided by your website hosting company. Those who are more technical may want to have more control over how the website is set up, you’ll want your own web server. Otherwise, one of the most common CMS (content management systems) to manage your website content and web pages is WordPress. In a few clicks I was able to set up and configure the website–and then install WordPress for the website. Once it’s all set up, I needed to add content, add pages to the website. A basic website should have at least several pages:
– Home Page
– About Us Page
– Privacy Policy Page
– Contact Us Page
– Content Page (at least one content page, typically more)
For my basic website, at www.negativeseo.icu, I ended up with 7 web pages total, once I added a few services pages. I used a service called SEMrush.com that allows you to find out the common keywords that people to use when they use a search engine. This is called keyword research, and it allows you to put in a topic and see the keywords that are commonly associated or related to those keywords. You can see how popular those keywords are, as well, so you can choose to create web pages around the more popular keywords. In my case, for “negative SEO”, I chose a few other keyword pages:
Negative SEO services
Negative SEO case study
Negative SEO tactics
Choosing these keywords and adding content to these pages were the first part of the overall Search Engine Optimization (SEO) process. SEO is the process of massaging, writing, and optimizing your website so that it shows up well in the search engine results.
Search Engine Optimization and Search Engine Rankings
Once I chose a few keywords and pages that I wanted to “rank for” or show up for in the search engine results, I needed to create text for those web pages, and optimize those web pages. Or at least start to optimize those web pages. My overall goal was to see how quickly I could buy a new domain name, create a really basic website with not much web design, and make it show up in the search results. I only did a few things–which was to create text on each web page, along with a good title tag that describes the web page. Adding a link from to each page from the website’s home page (in the form of a clickable menu), is also what I did.
Typically, when you launch or add a brand new website, SEO takes time for everything to work properly and for your website to show up exactly for the keywords that you want. It can take months or even years for your website to be optimized well enough for it to gain a lot of traffic from the search engines. This typically requires adding lots of good, relevant content on your website, as well as getting linked on other websites. Other websites will help your website “rank” because they add trust. When a trusted website links to your website, the search engines see that, and trust your website more, which give them the confidence to show your website more often in the search results. There are hundreds, if not thousands, of search engine ranking “factors” and combinations of factors. It’s really pretty technical, but the first step is creating content, words on your website, along with images and photos, that’s relevant to the topic of the website.
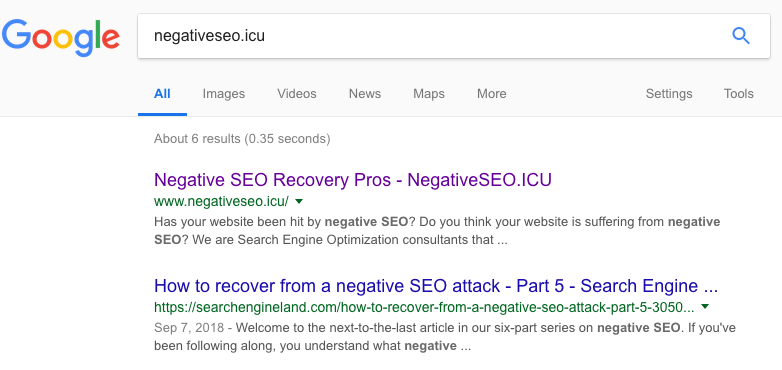
In my case of negativeseo.icu, I wanted to put up the website quickly–and just make it “work”. My goal wasn’t necessarily to “rank” for the keyword phrase “negative SEO” or “negative SEO recovery”. But initially to get it to rank well for the company or service nav, which is “negative SEO recovery pros”. Once the website was up and running, all I literally had to do was add the website to Google’s Search Console, a feature reserved just for website owners to get information about their website. As a part of Google Search Console, you have the opportunity to submit your website. I used their “Fetch and Render” tool, and within 2 minutes I had my website showing up in Google for the service name, “negative SEO recovery pros”. While it took me about an hour from start to finish (including actually writing the content for each page), I was able to get the brand new website, on a brand new domain name, to rank #1 for its brand, it’s service or company name. This is great–years ago I remember this taking days if not weeks to show up in the search engine results pages. Now, if you create a brand new website, and you go through the proper steps, it can show up within minutes, and you can start receiving traffic to it from the search engine results.
The Specifics: The Timeline
If you’re more technical, like I am, then you may be interested in the specifics details about how I made this new domain name and website, negativeseo.icu, on a brand new TLD, rank for its brand name so quickly. There are several steps, and I started them at 8:25pm Central Standard Time–and it ranked for its brand name and website name, keywords in the domain name, in about an hour from start to finish. Ranking literally took only a few minutes. The following is the entire timeline, from start to finish.
Timeline
8:25pm CST – Started buying negativeseo.icu domain name for a new website. Also purchased nseo.icu domain name at NameCheap. Registered the domain names for 2 years.
8:30pm CST – Payment processed, domain names purchased at NameCheap.
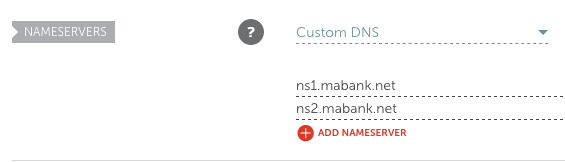
8:31pm CST – Updated the name servers on the main domain name to point to the web hosting/web server.
8:34pm CST – Set up the domain name’s web hosting on the WHM (Web Host Manager) on a VPS provided by HostDime.com.
8:39pm CST – Used cPanel’s WordPress Manager to install WordPress on the domain name.
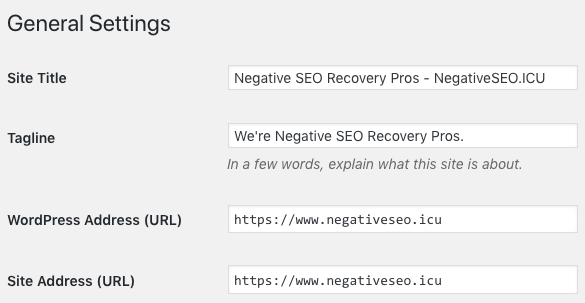
8:41pm CST – Initial WordPress site installed, logged into WordPress site to add/update settings in WordPress:
- Settings/General – New site name and tagline. Changed web address to http://www.negativeseo.icu
- Installed WordPress Plugins. Security plugin, Yoast SEO, Forms plugin.
- Updated Permalinks
9:00pm – Finished adding content to the site. About Us, Contact Us, Privacy Policy, and Home Page content.
9:18pm – Updated some site content and added menus.
9:20pm – Added CloudFlare.com to the site. Updated Name Servers on NameCheap.com website to point to the CloudFlare.com servers.
9:25pm – Updated the WordPress theme to a Genesis theme, sample child theme.
9:29pm – Added Google Analytics to the site. Set up Google Analytics account, added code to the header area of the website.
9:31pm – Added the website to Google Search Console, verified site as the site owner. Google auto-verified the website because I had added Google Analytics on the site. This makes it very easy to verify your site with Google. Previously, it was much more difficult, as you had to do the verification manually–by setting it up and then having the site verify that you’re the site owner.
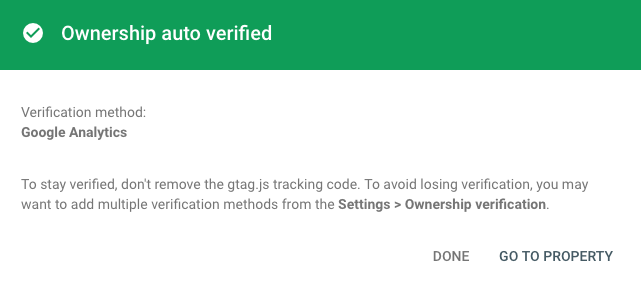
9:34pm – The site is verified in Google Search Console, but it usually takes a few days before they provide data. This is a brand new site and brand new domain name, so even when there is data there won’t be much available. We have to add links to the website and ask Google to crawl and index it first.

9:35pm – Navigated to the Google Fetch and Render tool to ask Google to start crawling the website and indexing it. https://www.google.com/webmasters/tools/googlebot-fetch
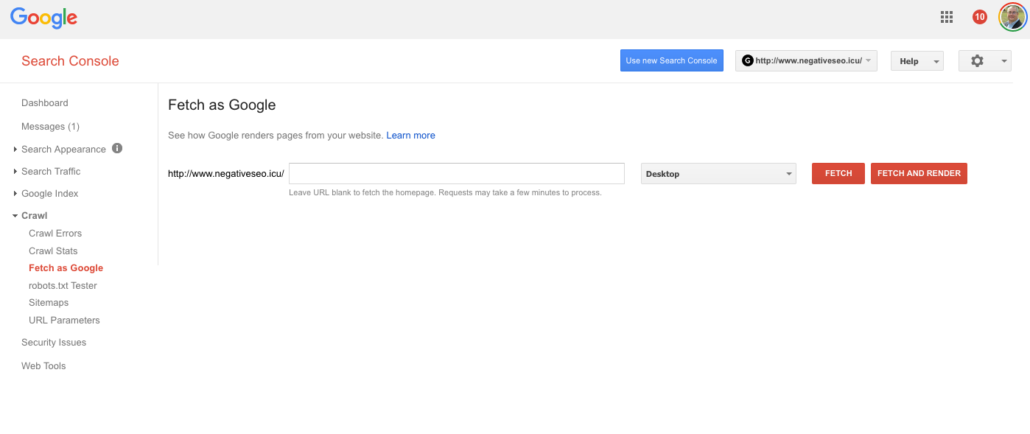
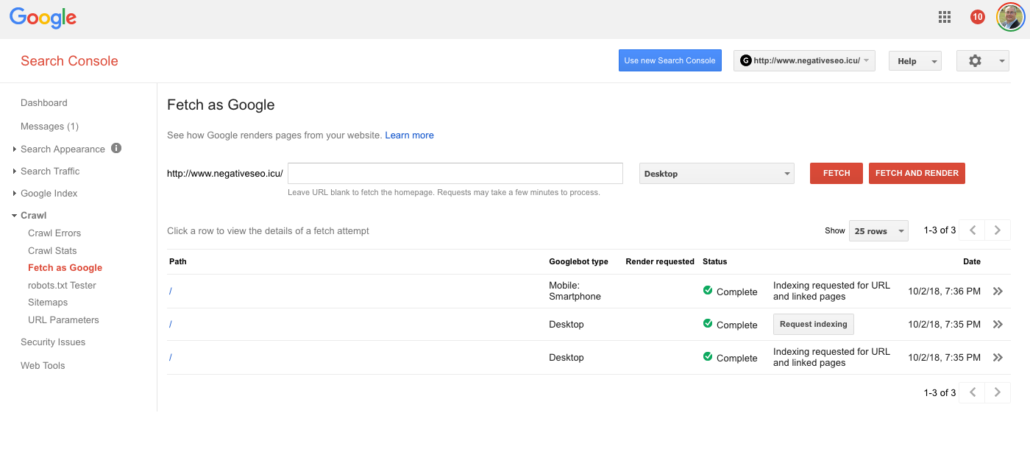
9:37pm – Used the Google Fetch and Render tool to ask Google to index the site and crawl it with their mobile crawler and their desktop crawler. Google now has two different crawlers–one for mobile and one for the desktop versions of their index.
9:39pm – Google has now crawled and indexed the website. That’s 2 minutes after I asked Google to crawl and index this brand new website, that was registered about one hour ago. It is ranking for #1 for “negative SEO recovery pros”. This is not a highly searched-for keyword, and most likely no one has ever searched for this keyword phrase. However, it is ranking for its brand name within 2 minutes of requesting that it be crawled and indexed.
What Happened the Next Morning?
Next Morning – Checked the site in Google, and the site has all 7 pages of the site indexed. Still ranking for the site’s brand name. Moved the site from HTTP to HTTPs via CloudFare. Turned on the settings to enable HSTS, forcing the site to always load via HTTPs and not via HTTP. So, if http://www.negativeseo.icu is requested in a web browser or via a search engine crawl, it will load has https://www.negativeseo.icu instead. Once this was in place on CloudFlare, I updated the settings in WordPress (Settings/General) so that the site itself knows that it’s https://www.negativeseo.icu and not http://www.negativeseo.icu.
The reason why I had to first get the site crawled and indexed in the HTTP version is this: I wanted to see how fast I can get a brand new domain crawled and indexed in Google. That seems to be within about 2 minutes after requesting that Google crawls it. The only part that slowed it down was the installation of WordPress and the buying of the domain name. Once CloudFlare is added to the website (which gives us benefits such as speeding up the website via website caching and stopping bad traffic from hitting the website), they give us a free SSL certificate, which allows us to have the site on HTTPs. This does take time, though, and in this case, was under 12 hours to get completed. Normally, if you’re not on a time crunch, it’s best to wait until the website is ready for HTTPs before asking Google to crawl it.
The next day (next morning), I went back to Google’s Fetch and Render tool and requested that the site be re-crawled again, this time via HTTPs. This required me to do this:
– Log into Google Search Console https://search.google.com/search-console
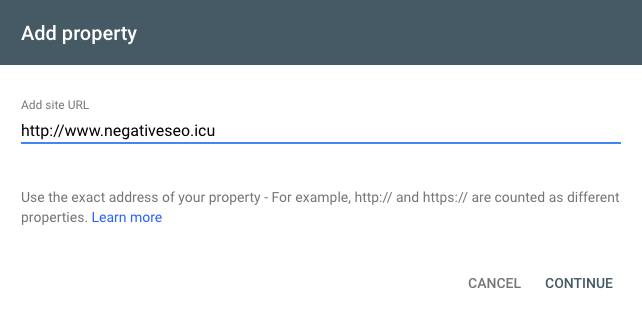
– Add the HTTPs version of the site as a property
– Go to the Google Fetch and Render tool https://www.google.com/webmasters/tools/googlebot-fetch
– Select the new HTTPs version of the website
– Do a “Fetch” of the home page
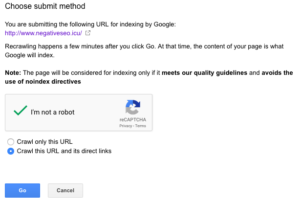
– Request Indexing by clicking the Request Index button.
– In this case, it’s important to request that they crawl the URL and its direct links.
Remember to go back to Google Analytics and make sure it knows that the website is HTTPs. I had to do this, since I first set up the website as HTTP and not HTTPs. Normally, you wouldn’t have to do this, as the website will already be set up as HTTPs.
It will take some time for Google to realize that the site has been moved to HTTPs from the HTTP version, and I’m not quite sure how long that will take. Generally I’d give it a day or two at most. This is not really a concern, at this point, for a few reasons, though. The site is indexed and when visitors click on the search engine result listing they will be taken (redirected) to the HTTPs version of the website. Usually I recommend that you ask Google to crawl the HTTPs version first and not the HTTP version first. As I mentioned earlier, I did get the HTTP version crawled first since I was under a time crunch to get it done. This won’t have any effect on search engine rankings or traffic to the site at this point, though, as it’s a brand new website anyway.
Getting Your New Domain Name Registered and Indexed by the Search Engines
Based on my detailed timeline and the process and procedures I went through to get the new domain name indexed in the search engines, here’s a quick overview of the steps I took. I was able to register a brand new .ICU domain name, put up the website, and get it crawled and indexed in just a few minutes. Minutes later, after requesting that Google crawl the website, they crawled and indexed it.
- Register the domain name.
- Set up web hosting for the domain name.
- Change the name servers of the domain name so they point to the new web hosting.
- Install WordPress on the web host.
- Configure WordPress.
- Add content on the website.
- Set up Cloudflare.com and HTTPs on the website.
- Add Google Analytics on the website.
- Verify the website in Google Search Console.
- Use the Google Fetch and Render tool to request crawling and indexing.
That’s it–those 10 Easy Steps to getting your brand new domain name registered, set up, hosted, and indexed in the Google search engine. Have any question about any of these steps, what they mean, and how they’re implemented? Feel free to get in touch with me.